A 120-ft Artificial Stream in Southwest Oregon: Design and Construction

From a dream it came, and I began to work….

Exactly how the thought began, I don’t recall. But once I imagined the possibility of attracting dragonflies and damselflies to “my back yard,” not to mention the sure possibilities of birds, mammals, amphibians, reptiles, butterflies, and more, I began to work on the design of an artificial, recirculating stream in my back yard. Below is my first complete drawing that includes some dimensions and features of the envisioned stream. The most unique feature is the hyporheic zone, an area of subsurface water flow to provide cooling, filtration, and additional organism habitat (see cross-section).

My first structural design of the stream, December 31, 2018.
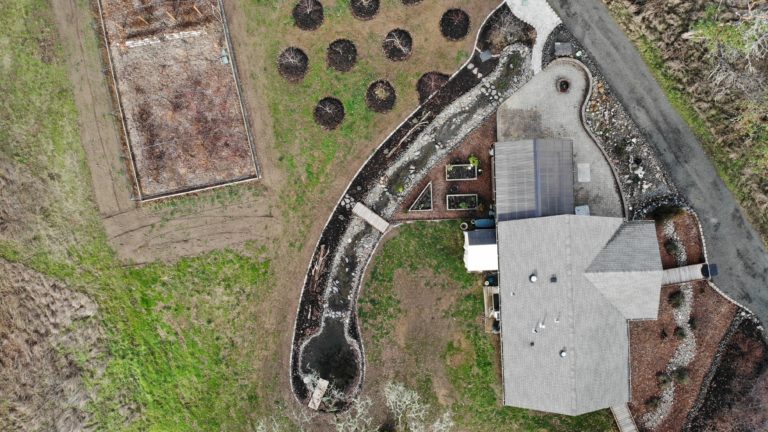
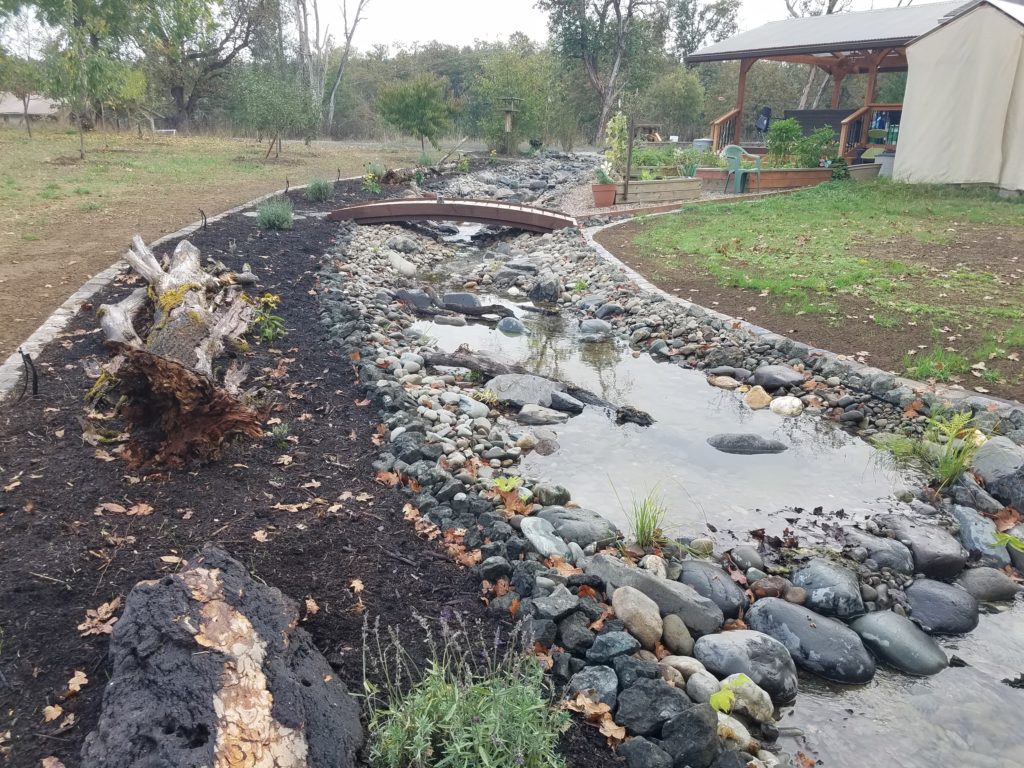
Having worked, studied, and played in streams for decades, imagining how the stream would look was easy and a fun creative process. However, the details I knew little about were the liner, pump, filtration, and putting it all together. But I couldn’t let that stop me; I just needed to do my research and learn. I did the usual internet searches for descriptions of options for different kinds of pumps, filters, etc., and how to put it all together. I asked questions in pond/pump forums. I also talked to local pond and pump people. Turns out my interests were rather unique, so I had to settle on the final configuration on my own. 
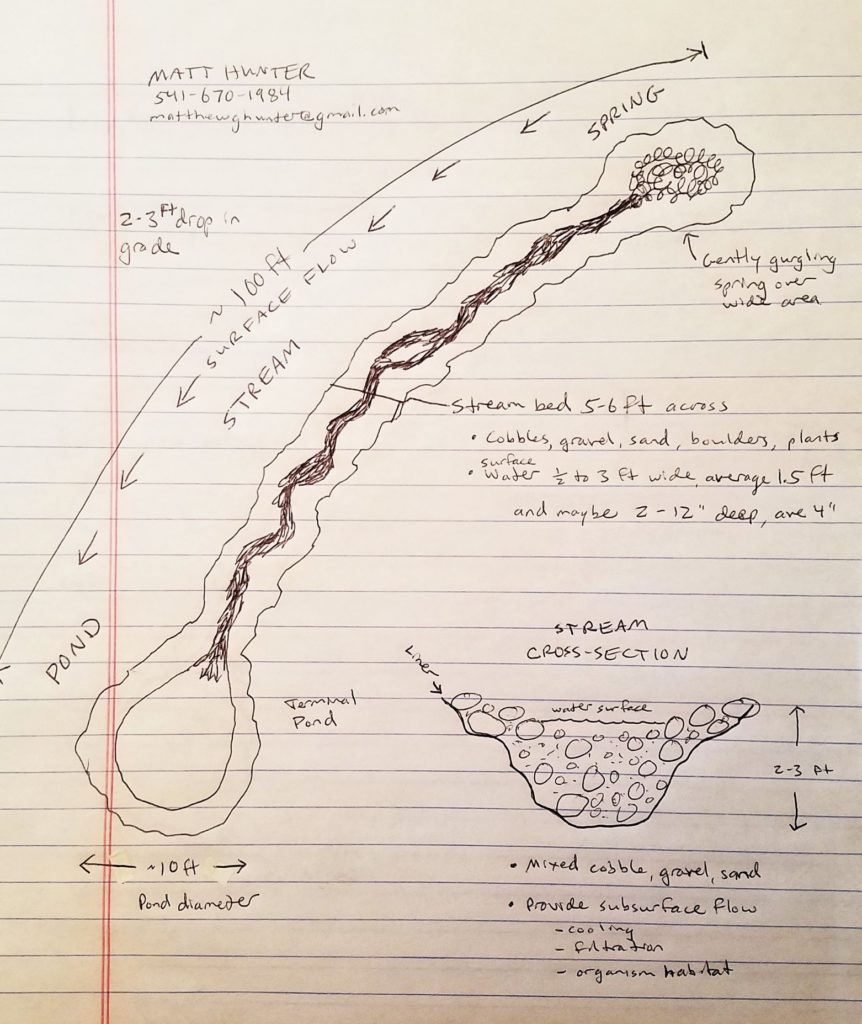
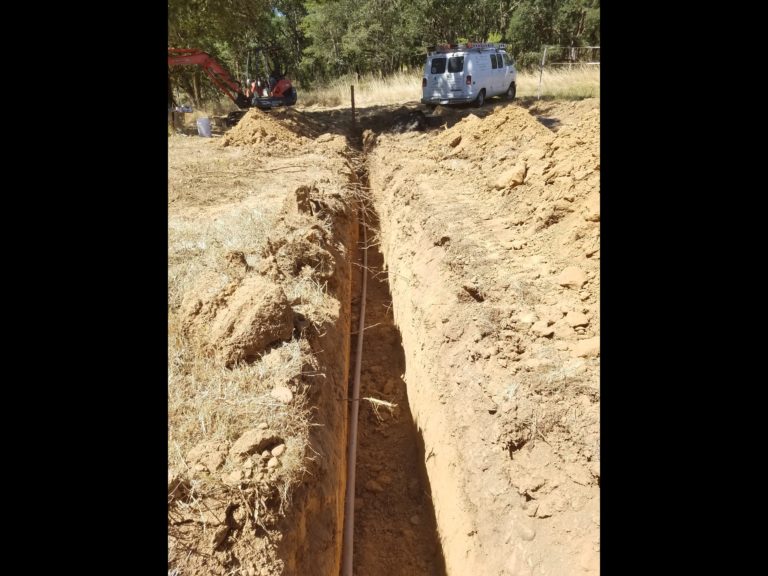
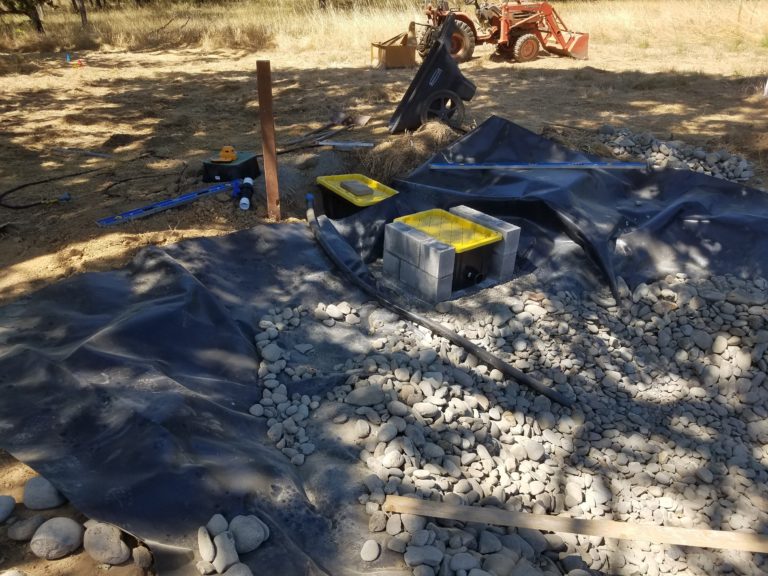
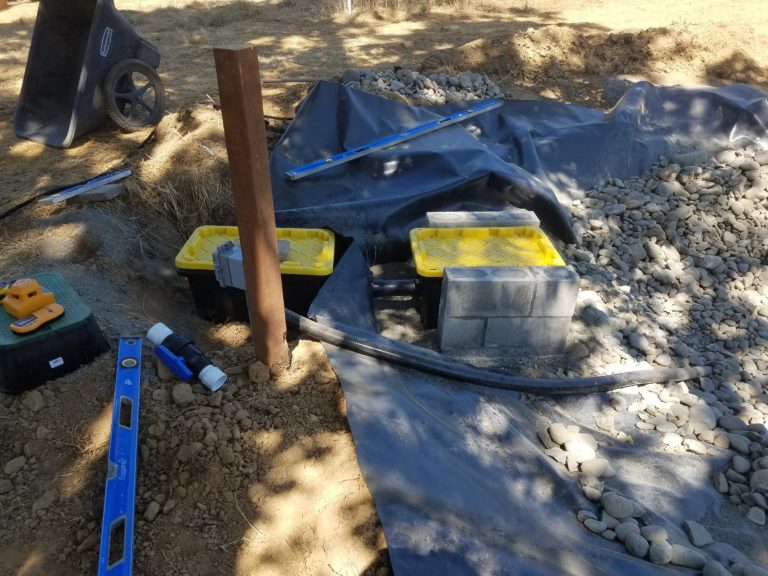
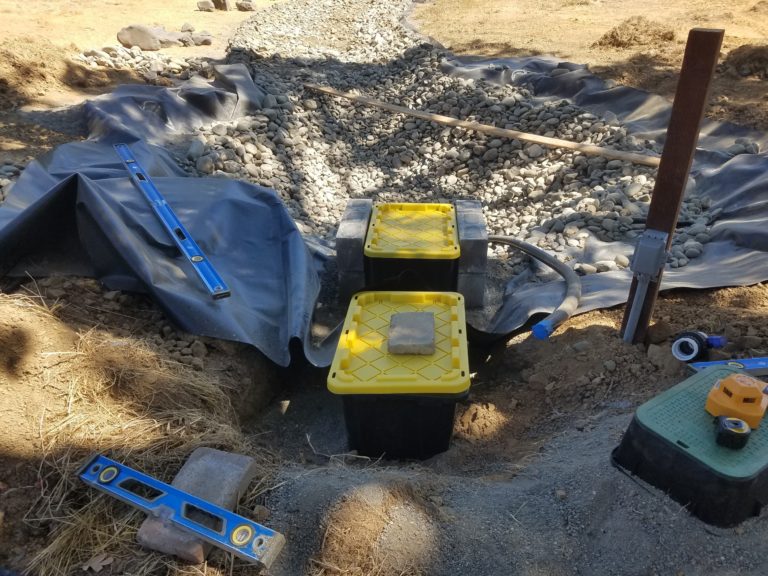
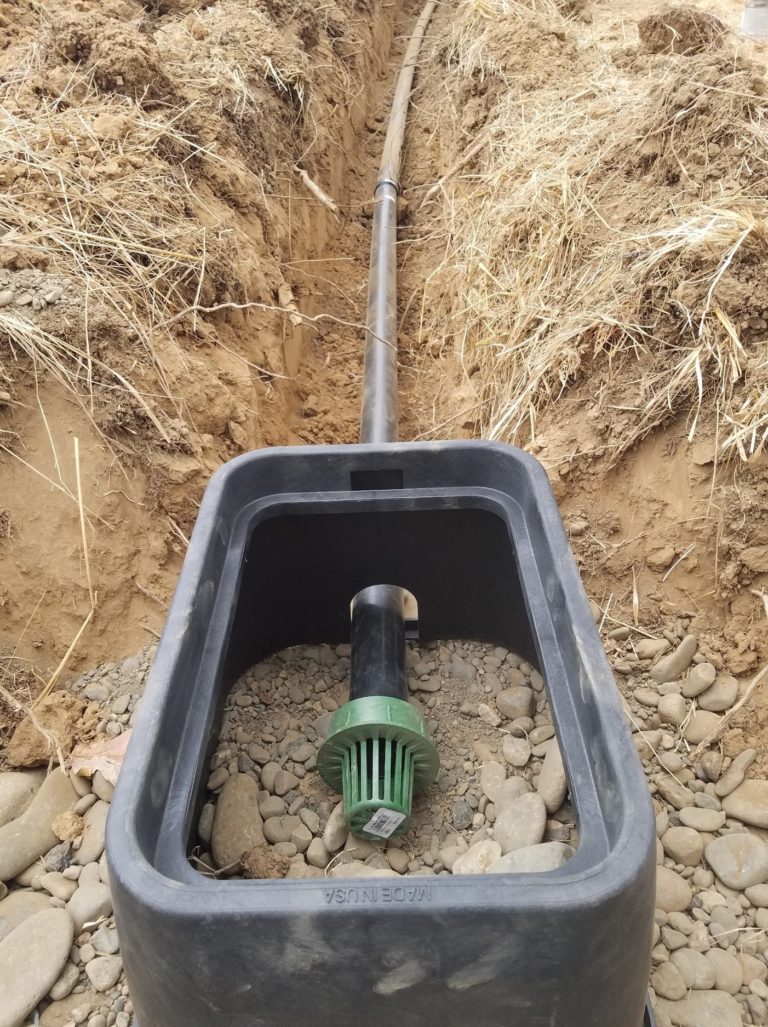
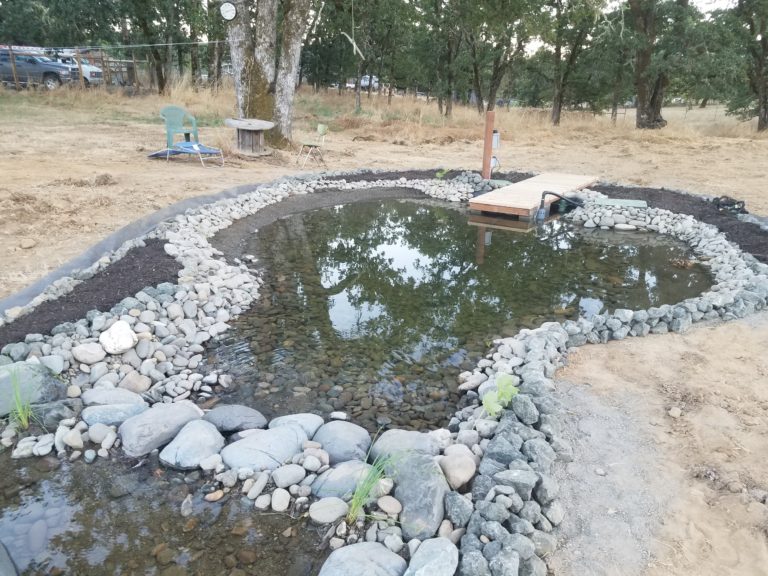
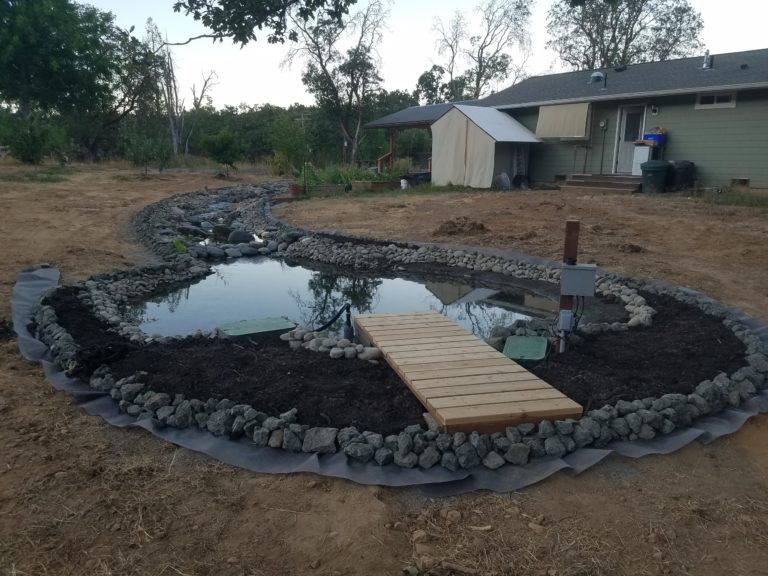
Sizing the pump–in gallons per hour (GPH)–was both a matter of water turnover rate (recommended at 1-3 times per hour for ponds), as well as how much water I wanted to be flowing down my stream channel. My hyporheic zone introduced an unknown subsurface reservoir and flow, so I estimated the hyporheic volume of water to be about 1/3 the substrate volume, and the flow rate to be a small fraction of the surface flow. After consulting a local pond supplier regarding pumps, I ended up with a Periha PB-25000. This a DC-powered, amphibious pump capable of three flow levels and associated minimal power usage (in Watts): 5280 GPH at 140W, 5710 GPH at 150W, 5945 GPH at 160W. The low energy use was an attractive feature as well. 
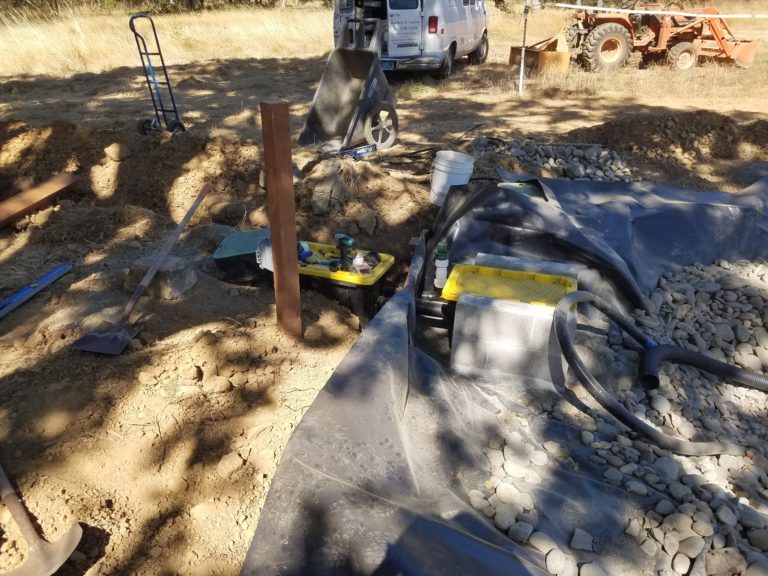
In researching liners, I saw mention of 
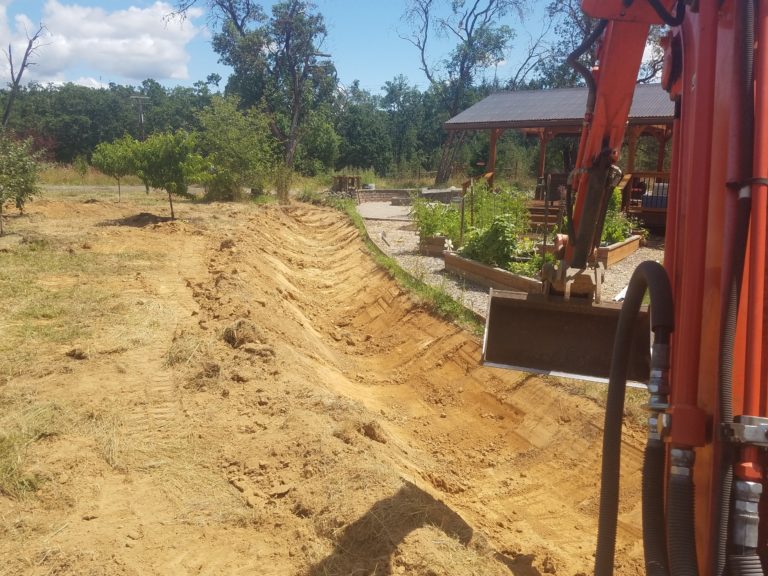
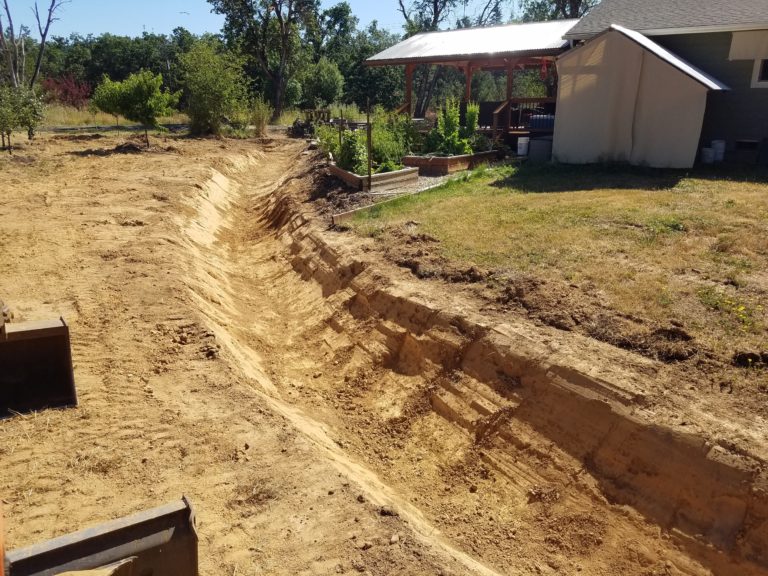
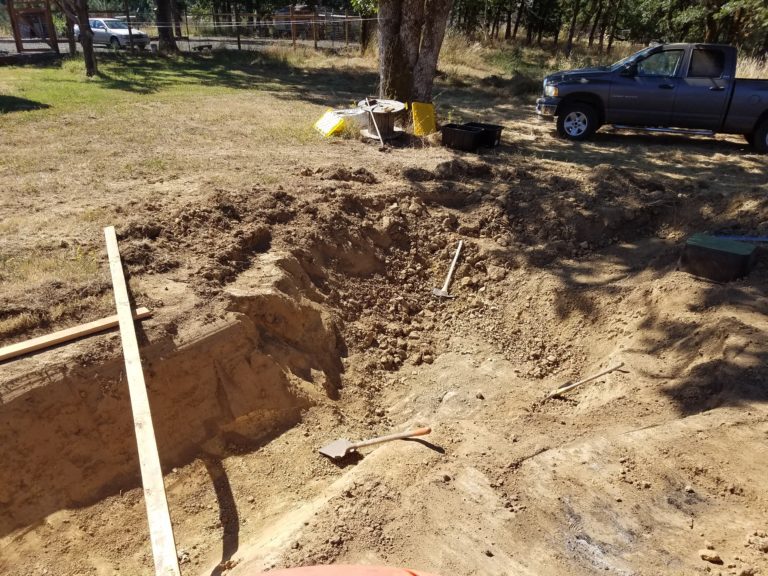
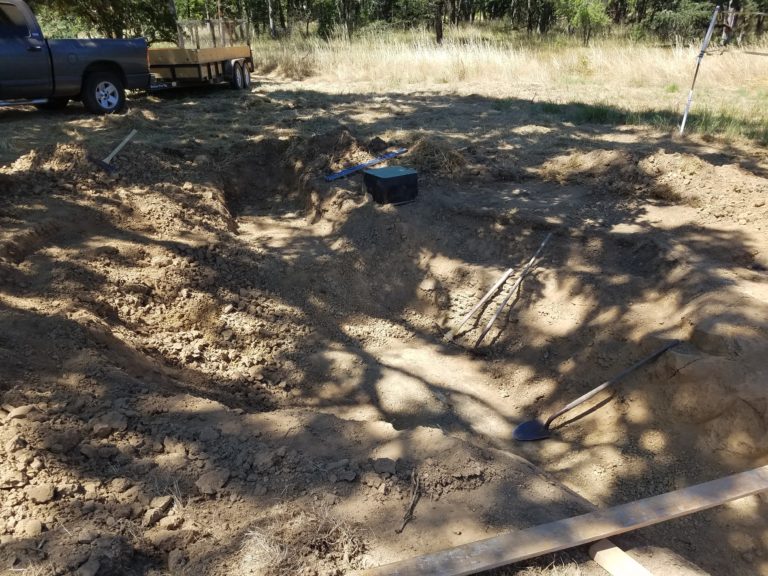
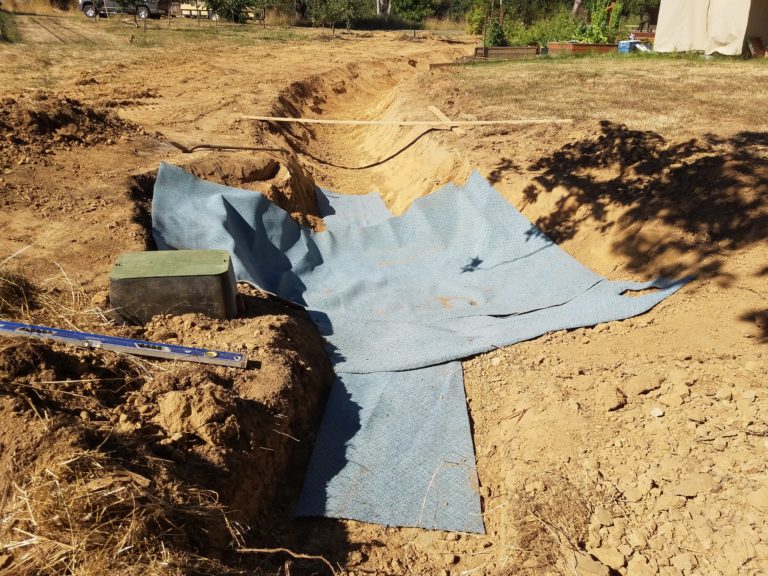
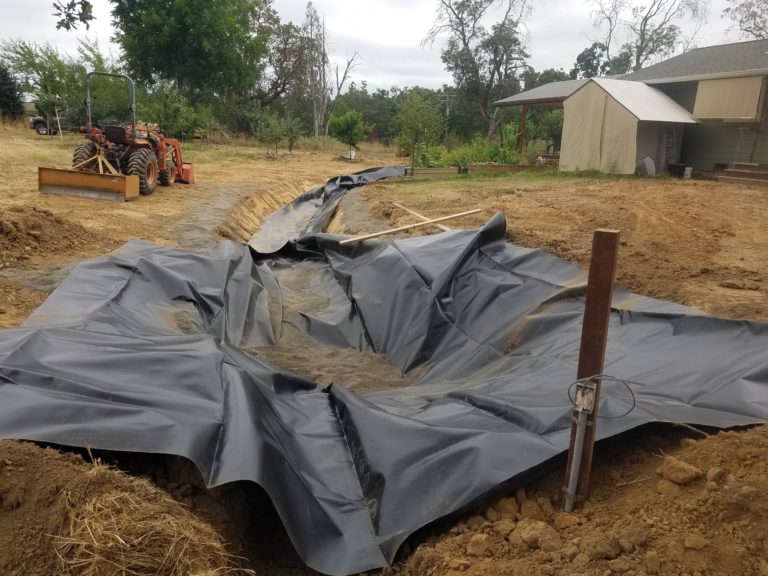
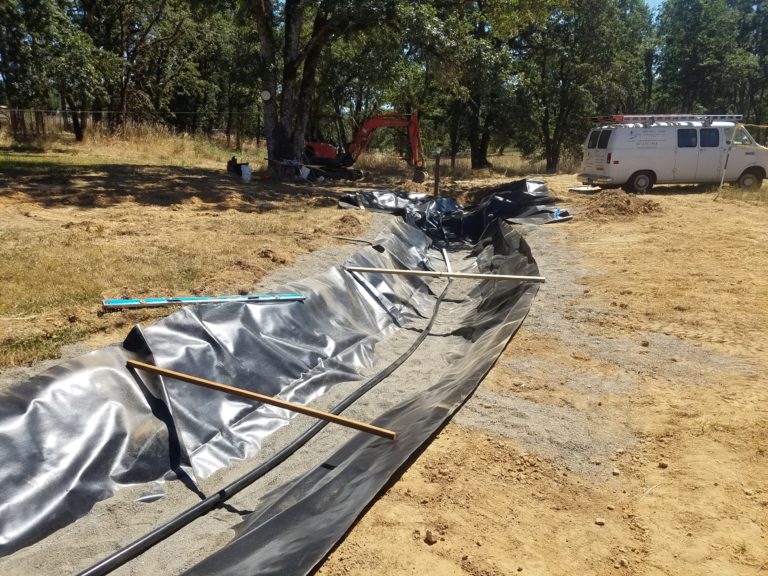
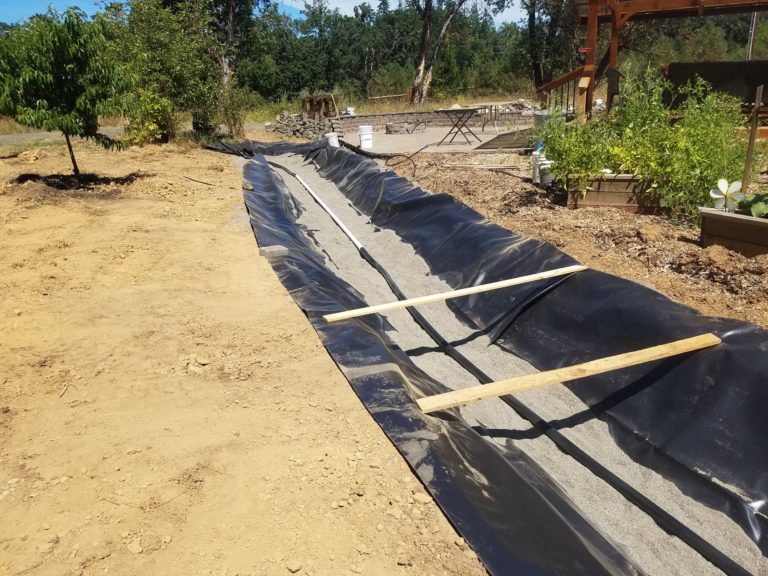
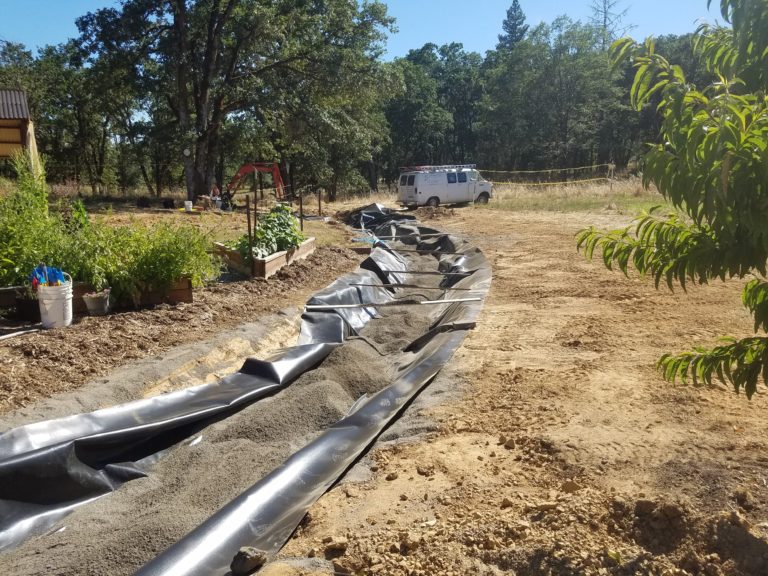
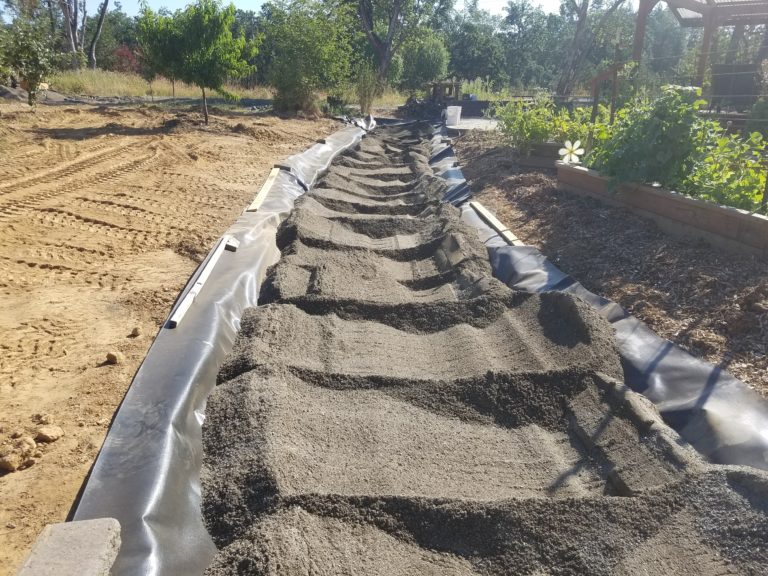
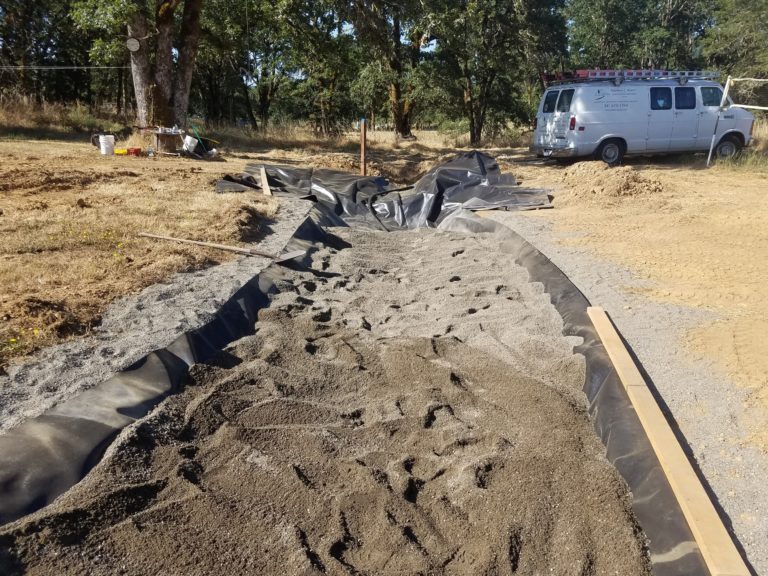
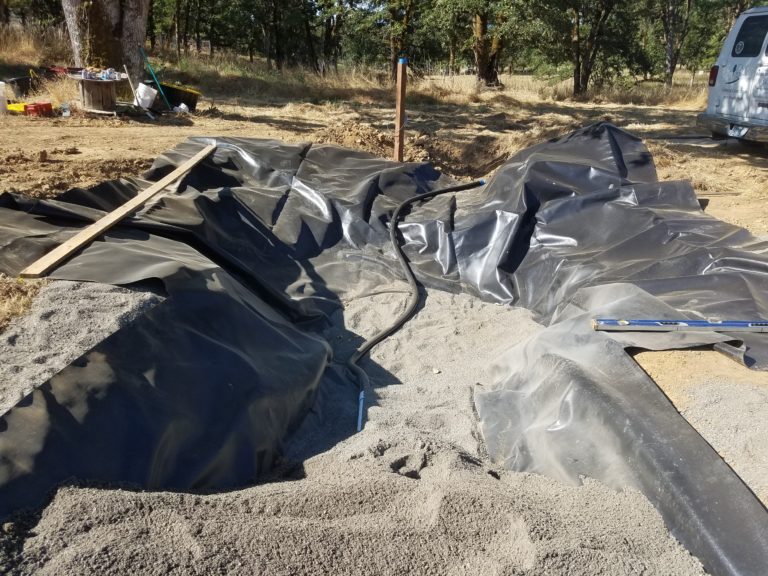
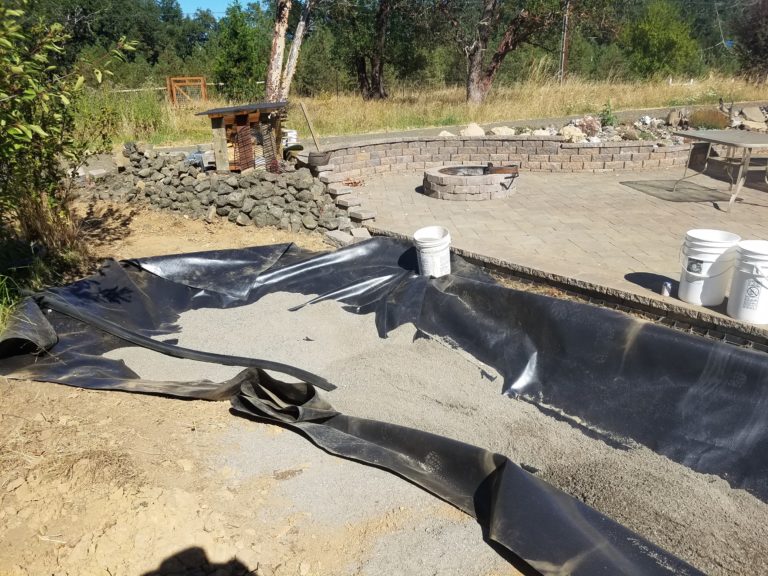
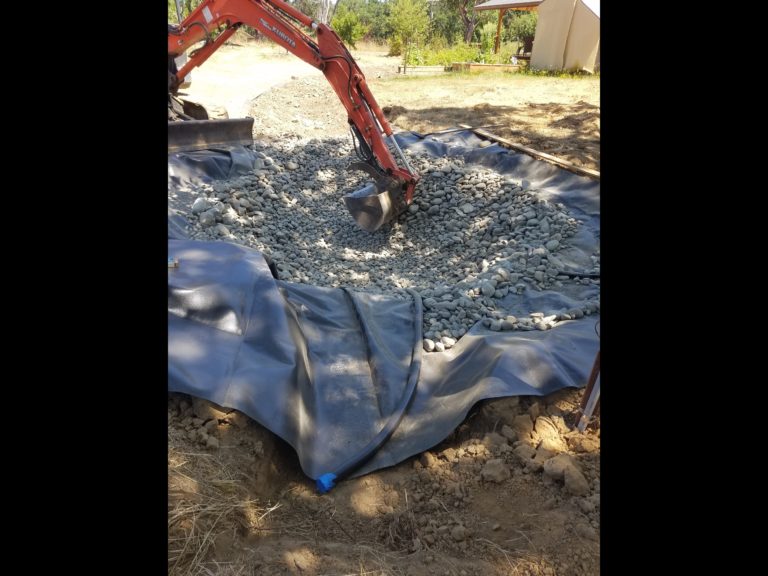
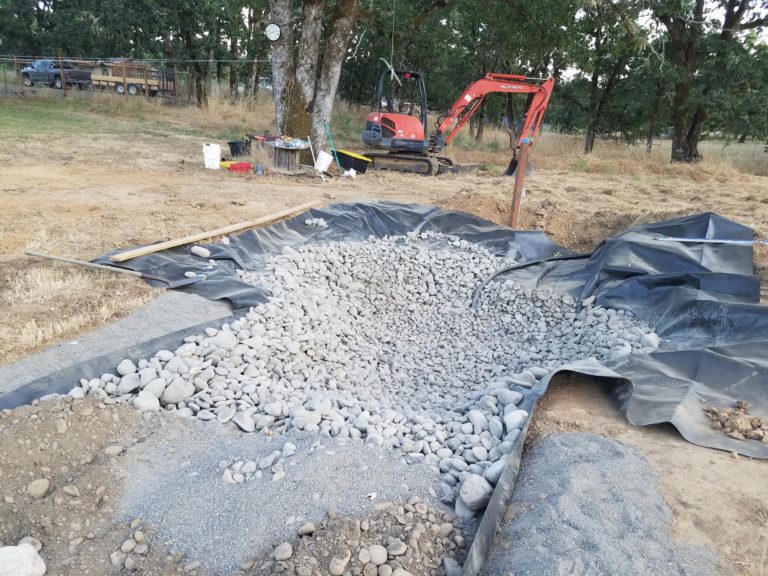
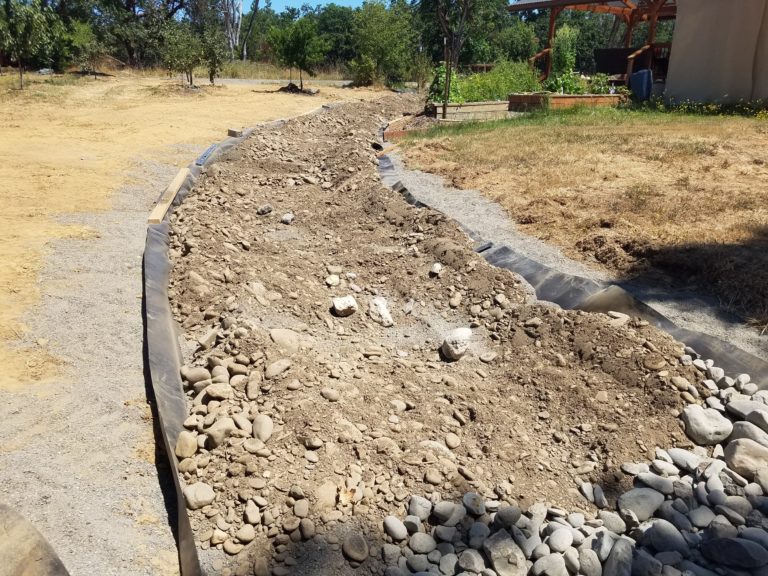
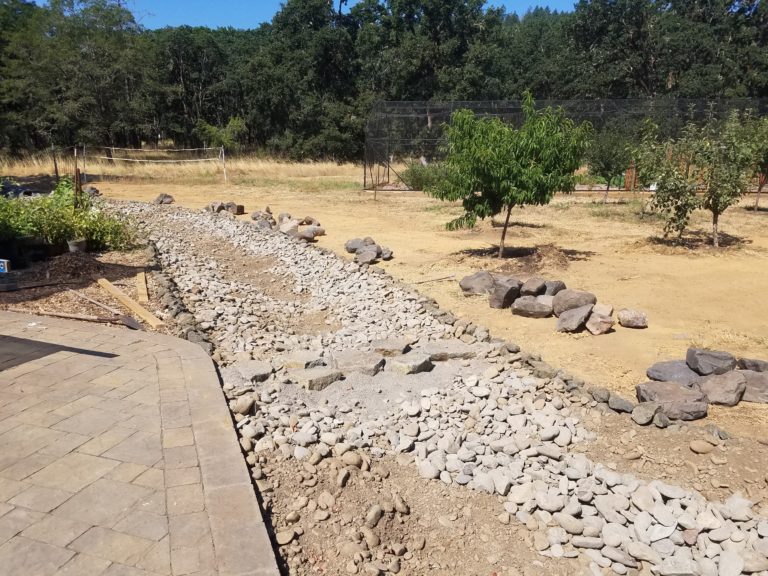
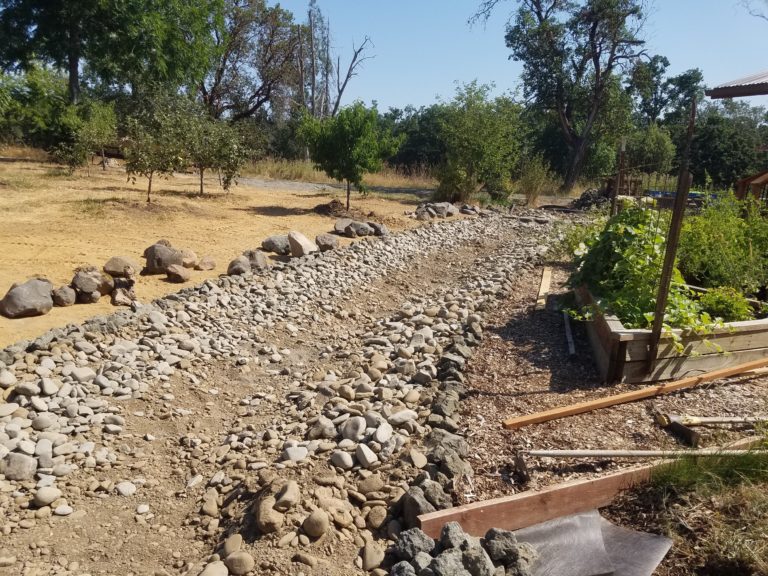
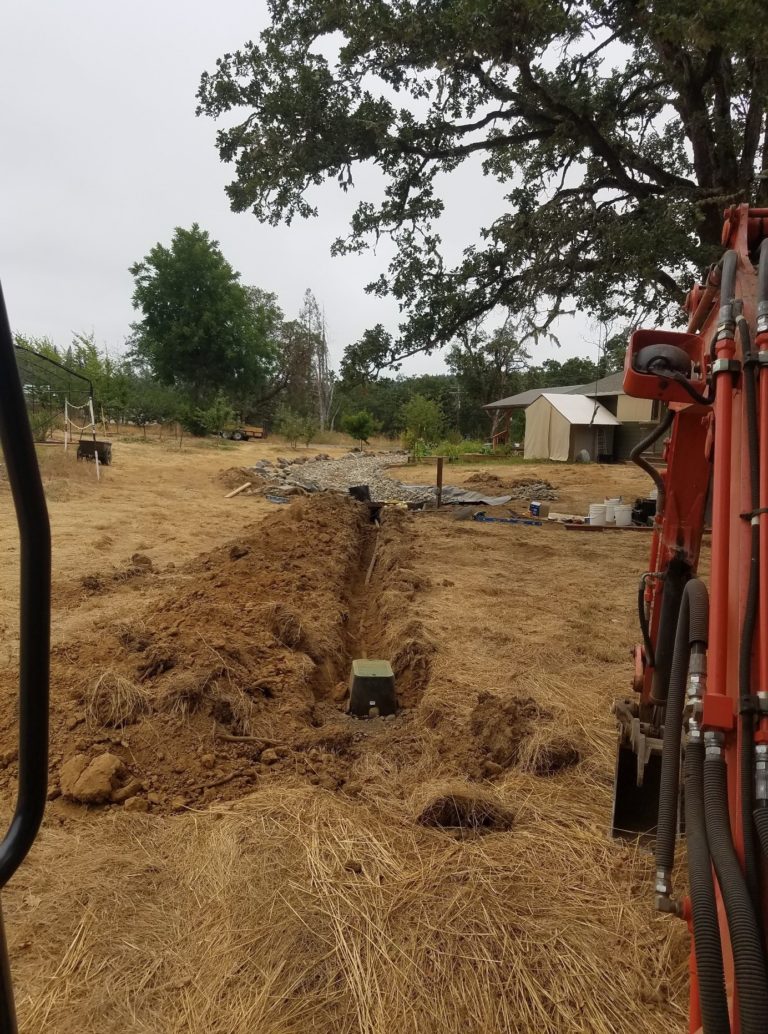
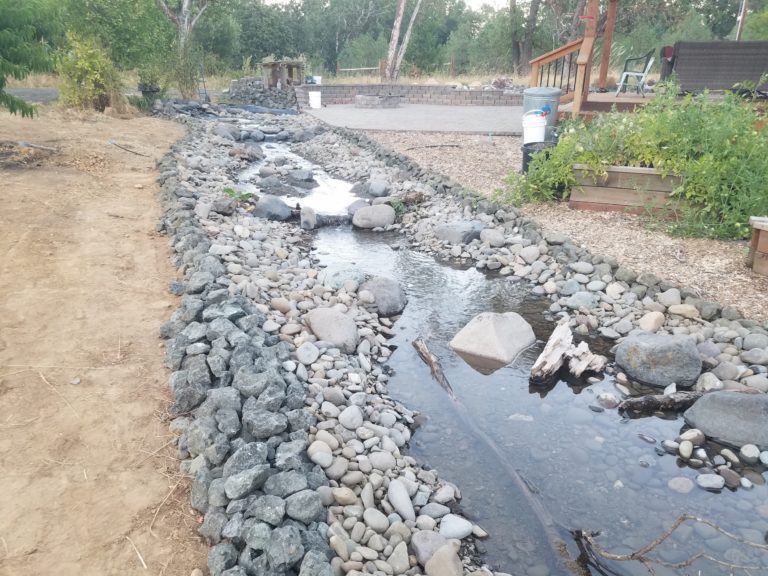
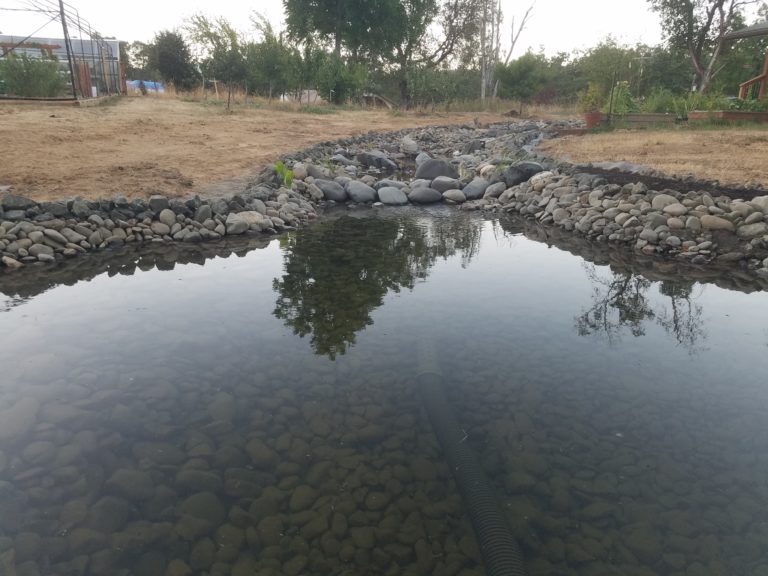
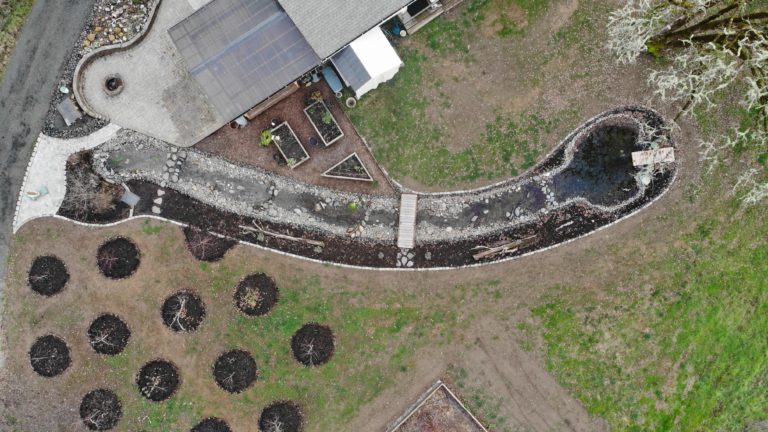
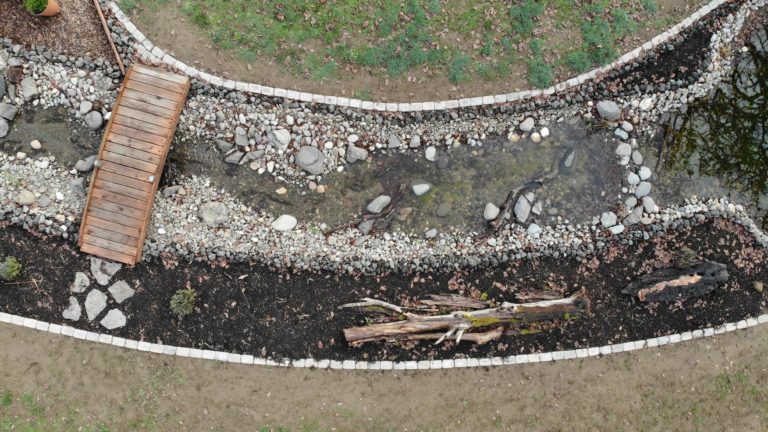
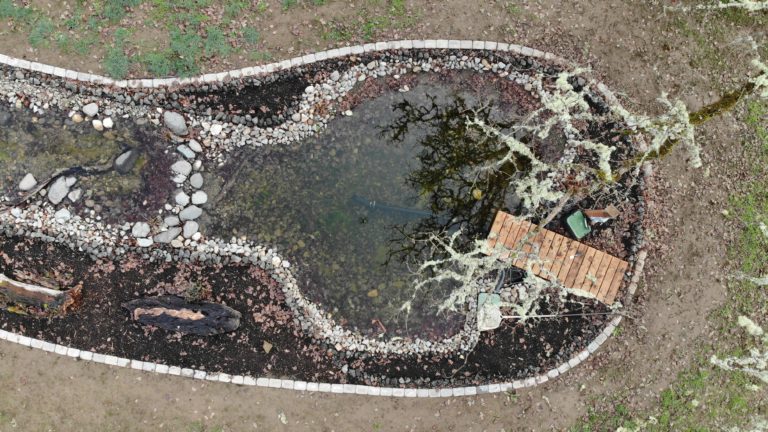
BTL liners in Bend, Oregon. They were well-spoken of and located in my home state so I worked with them to get a custom liner with a 20 ft x 20 ft square for the terminal pond attached to a 10 ft x 100 ft piece that would line the stream. I knew from using other materials that I needed to oversize the liner a bit, or undersize the excavation, to account for folds and variations. So, once I knew my liner dimensions, I began excavation. And in the mean time, I continued gathering materials.

Without a doubt the most difficult part of the design, excavation, and construction for me was the terminal pond area. The long stream section was pretty straightforward, it just went from the upper end to the lower end, dropping about 2.5 ft elevation over 100 ft distance and I was confident I could just move some material around if the water level ended up too high at one spot. But within the terminal pond area I needed to coordinate the interplay of a filter box, a pump box, a float for automatic filling, and an overflow outlet, all of which needed to be at a specific level with tolerances of less than an inch. In addition, the pond liner perimeter needed to be higher than the expected pond level to accommodate the expected pond level as well as extreme rain events. With a lot at stake I took one baby step at a time to be sure I was on the right path and that everything would work together in the end.

Once I had completed a rough excavation of the pond area, I was ready to place the liner. The liner was designed to withstand high puncture forces, but I decided to give it a bit of cushion–some old carpet–in the pond section where the deeper excavation had exposed quite a bit of angular, fractured rock. I also put down some sand in places in the stream section that had inclusions of more angular rocks. I also decided to run the electric line for the pump power supply under part of the pond, so did that before putting down the carpet. Once the carpet was down, I unfolded the one-piece liner from BTL liners, which was nicely folded and labeled.

Once the liner was unfolded and loosely placed, I began to put sand in the bottom to hold the liner in place as well as to create a bed for the return pipe to lay on at the bottom of the channel. The stream substrate would cover the return pipe and keep it cool.

In hindsight, I would rather have filled the majority of the stream channel with what they call “bar run,” which is a naturally occurring mix of sand, gravel, and cobble. The sand, once saturated with water, turned out to be rather squishy and unstable when walking on it, even with cobble on top. It has now settled  fairly nicely, but the bar run would have been a more stable substrate, at least initially.

Once the majority of the channel was filled with substrate, the fun really began: I began creating the surface channel structures–pools, riffles, glides–and adding a variety of instream substrates such as larger cobbles, boulders, logs and branches.

Now that I had some idea of how the substrate was going to lay, I needed to work out the final details and placement of the filter box, the pump box, and the overflow. It took quite a few hours of measuring, placing, and measuring again to make sure all the components were at the right elevation. It also took a lot of planning and work to figure out as well as install the piping between filter and pump boxes, getting through the liner without creating a leak, and hooking up the pump and return pipe. I did not install the float (for filling/supplementing water) or finalize the pond liner edge until I filled the stream and pond system with water; that way I was sure to get the edge just where I wanted it.

Rather than let excess water just overflow the pond, I installed an overflow intake and outlet. The overflow intake needed to be at the maximum desired pond level and below what would actually be an overflow of the pond liner. As part of the overflow, I also included a drain plug that would allow me to drain the pond (and all the water that would subsequently come down out of the stream) down to the level of the shelf that the filter and pump boxes sat on. The exit pipe from the overflow was put out about 25 feet down a gradual slope from the pond edge such that the top of the basin receiving the overflow water would be at or below the drain plug. I put a plastic “screen” over both ends of the overflow to prevent rodents and debris from getting in there.

At the upper end, the plumbing was much simpler: a 3″ ABS pipe with dozens of 1/2″ holes drilled in the pipe, and a screw plug at the end for easy access. The perforated pipe formed the supply for the “spring.” The spring feature was then created with a number of flat rocks on the “floor” and various small boulders surrounding the incoming water. The resulting gurgling sound is relaxing, and the visual of the water gushing forth from the depth of the rocks is pleasing.

Once all the boulders and wood were placed, the stream channel units were created, the pump was all hooked up, and the stream and pond were filled with water, I turned on the pump. Initially, I nearly panicked, as the pump was running but no water was coming out from the spring. I wondered if I had crushed the flexible pipe under all the material, or if a joint had come loose. How would I ever find the problem?! Long story short, I had not adequately primed the pump and it was just swooshing around a mix of air and water. Once the pump was properly primed, the water flowed and a stream was born.

For the first few days after starting the water flow (August 6), I topped off the pond level with a hose, as some drop in the water level was evident. On August 9, I installed a float that would automatically fill the pond when the water level dropped about an inch. I installed a meter in the supply box so that I could track the amount of water used. I was amazed that during the hot summer months of mid-August, the stream/pond system would lose about 140 gallons of water per day to evaporation. This seemed like a surprisingly large amount of water, but matched well with calculations of evaporation that depended on temperature, wind, and surface area. When the cooler weather of fall arrived, evaporation decreased but was still around 50-60 gallons per day. By the end of 2020, over almost five months, the water meter had recorded the addition of 11,618 gallons from August 9 to December 30. This amounts to approximately 1/4 of my water usage for the same period. I’m still astonished how much evaporation takes place. I would suspect a leak, but as I said, evaporation formulas match well with observed amounts added. Thoughts?

Shortly after the stream was flowing I added a variety of both aquatic and riparian-associated plants. Hopefully they will survive and start growing again in spring 2021. I also added a 5- to 6-ft wide wildflower bed along the NW side of the stream, in which I planted a variety of wildflowers and shrubs; mostly native, but some non-invasive non-natives such as lavender, as well as a couple decaying logs. My hope is that all this habitat will attract many pollinators and other insects and wildlife. Following are some aerial photos showing the position and shape of the overall stream and terminal pond, as well as some detail of the channel structure.

The following video shows a short flight up the stream from just a few feet above it (click on full screen to get the best view). This will give you a good feel for the layout and the amount of flow. You may recall that the pump is capable of several levels of flow. It was set at the lowest level (5280 GPH) and I have not changed it since.

Well, I hope you enjoyed this description of the design and construction of this 120-ft long stream. If you have any question or suggestions for this post, please send them my way and I will update the post to make it better. Thank-you! You can also check out my post “A 120-ft Artificial Stream in Southwest Oregon: Life in the first Five Months,” where I describe the animal life I observed in or near the stream in the latter five months of 2020.

This Post Has 11 Comments

  1. Polly

    This is a work of art! It looks like you will get many hours of enjoyment.

  2. Jeff Morgan

    Amazing Matt and thank you so much for sharing. We have corresponded separately as I am in the process of adding a stream to my pond but size wise it is very small compared to yours with only 10,000 Gallons. You will hopefully recall that I asked the question regarding wildlife versus pond pump in trying to protect the little tadpoles and small water insects from being sucked into the pump area. I am now thinking that the compromise could be to place the pump (needed for the stream) immediately below where the water joins the pond, an area where the little insects will stay clear from as the water will be turbulent compared to the rest of the pond. Thoughts?

    1. Matt Hunter

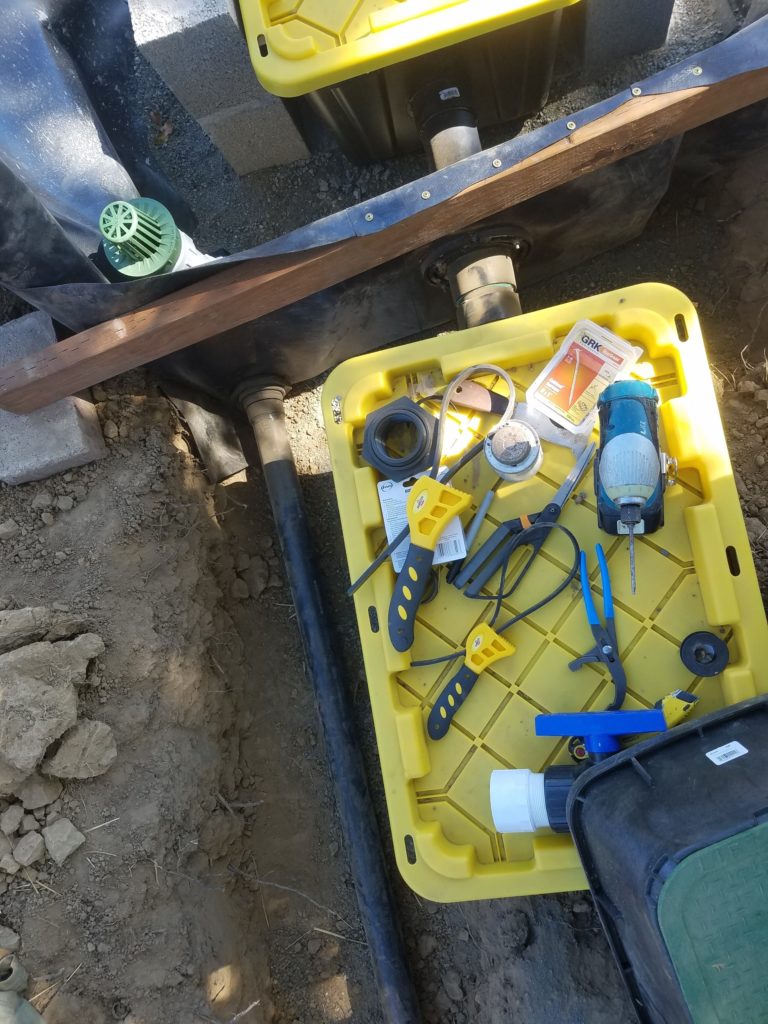
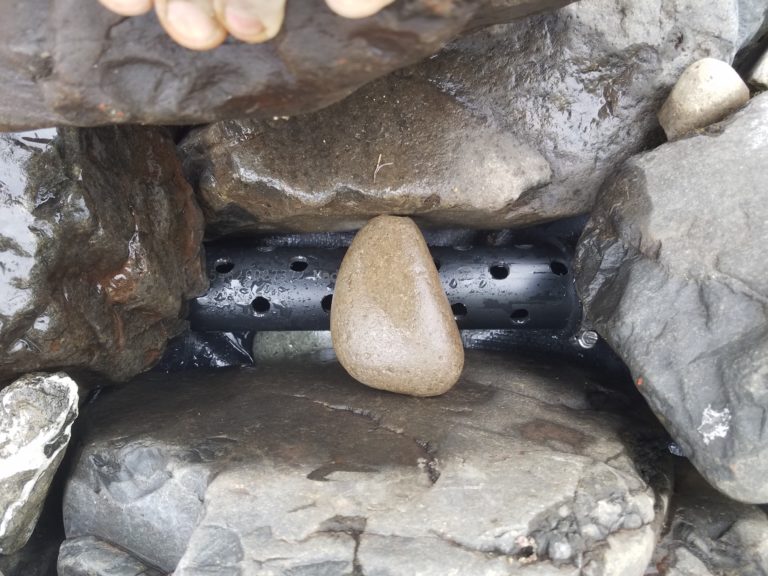
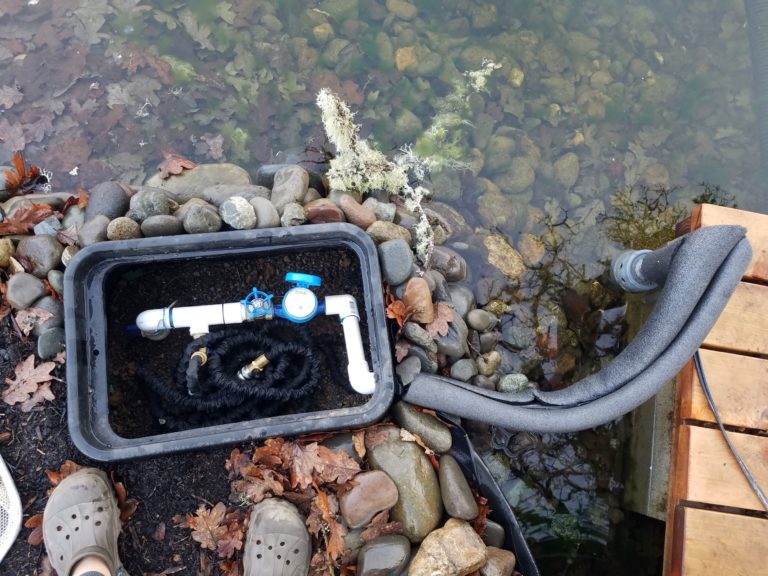
      Hi Jeff. That might reduce but not eliminate the number of insects getting into your intake. You certainly don’t want your intake to be sucking up air or other debris coming down at that spot; keep an eye out for that. My intake consists of a perforated pipe that leads to a filter bin where the pump intake sucks up water. I’ve not gotten many insects in the filters; just one species that I’ve seen, and a few snails. My perforated pipe lays out into the pond at kind of mid-level.

  3. Diana

    Wonderful project and very informative writeup.

  4. Mitch

    I’m surprised it’s only 500 gallons. What’s the total capacity and what’s your GPH? My stream is only about 50 feet and the pond is larger than yours so I can shut it down every night. I also do not have as much subsurface flow as you do. We still get lots of visitors – damselflies, dragonflies, chorus (always), and northern red-legged (occasionally) frogs, and a nice population of water striders, . Lots of birds bathe in the stream (juncos, varied thrushes, robins, waxwings, Townsend’s warblers, and pine siskins), and currently we have a belted kingfisher as a regular visitor to dine on our goldfish (self-sustaining population).

    1. Matt Hunter

      Your setup sounds great too. I estimate the total capacity at about 4000-5000 gallons (including subsurface). GPH is currently at about 5280 (pump has two somewhat higher settings that I have not yet used).

  5. Mitch

    I’m guessing that when you turn off the pump the pond overflows and you lose a lot of water. I suggest dividing the stream into a series of catch basins so that all the water upstream does not overflow the pond.

    1. Matt Hunter

      Hi Mitch. Thanks for the thoughts. You are correct that if I turned off the pump a lot of water would flow from the stream into the pond and out my overflow pipe. The pump is normally on constantly, but has been off twice: once for a power outage and once while I was working on my house electrical. Based on my estimate, this might account for about 500 gallons per event. I should probably include this in my discussion of water usage. On a related note, although I made sure all was well at the beginning, it is possible, with settling, etc., that perhaps my float level is now set too high in relation to my overflow, such that I am filling higher than my overflow level, which would result in a frequent loss of water. I’ll need to check that again once we get a few days without rain because with the current rains there has been no water added. Oh, in regard to the catch basins, that sounds like a reasonable approach to reduce downstream flow, but in my design I want the subsurface flow.

  6. CLAUDIA C HUNTER

    Having seen your stream being developed, little by little, I knew it was taking a lot of thought and planning and work. Now, I realize it took about 100 times more of all that, than I ever imagined. Great job Matt ! I love the results. It will be interesting to see how winter weather affects the stream levels. Congratulations on a job well done.

  7. Barbara

    Wow, this is amazing, Matt! A lot of planning and work went into it. I am shocked at how much water evaporates.

  8. Stephanie C Neyhart

    Truly amazing, Matt. Well done and fascinating.

Leave a Reply